

Tutorial 16
Adding an object to the Dashboard
This tutorial will demonstrate how to add a new query object onto the dashboard. After this tutorial you will have the ability to add multiple query objects to the Dashboard, move them around and resize them.
A point to remember, is that objects can only be added to a Dashboard if the logged in user has been granted permissions to ‘Edit Queries’.
Perform the following steps:
- Invoke the NuVu Executive Dashboard from the NuVu Dashboard program group from the windows Start menu. The main NuVu Executive Dashboard window will be displayed. The contents of the dashboard object area should be empty, unless you or some other user has already added objects to the dashboard.
- Only queries that have at least one schedule defined that has a destination of NQR (the special NuVu Query Results format file that contains the results of a previously executed query) will be able to be added as query objects on the dashboard, so please ensure that you first create a NQR format schedule for an existing query before attempting this tutorial.
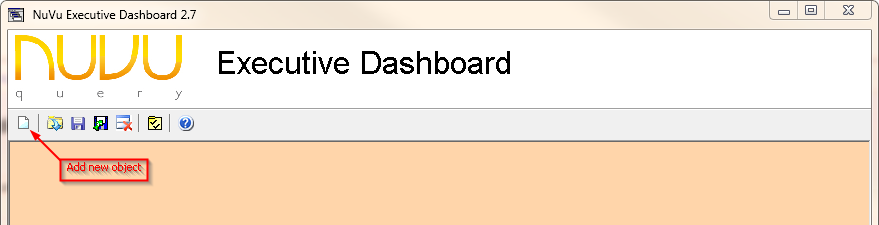
- Click the
 (Add) button on the left side of the toolbar (as highlighted in the previous screen-shot) to open the object dialog window, an example of which is shown below:
- Queries can either be displayed in Grid or Chart format, but to keep the tutorial simple, we are going to select the ‘Grid’ object type. Advise an appropriate ‘Object Title’, or leave this field blank to default the Title to the actual name of the query once it has been selected. This title will be displayed on the title bar of the object when it is displayed on the Dashboard. Next we need to select the actual query that is to be shown on the dashboard, so drop down the ‘Query Name’ list and select the appropriate query from it. If this list is empty, then you must first add a schedule to a query, and ensure that the ‘Destination’ is NQR format, and also ensure it is run at least once (by ticking on the ‘Run Now’ indicator on the schedule).Click Ok to confirm the changes made to the object properties. The Object dialog window will close and you should be presented with the actual object (and its results) displayed on the dashboard as per this example:
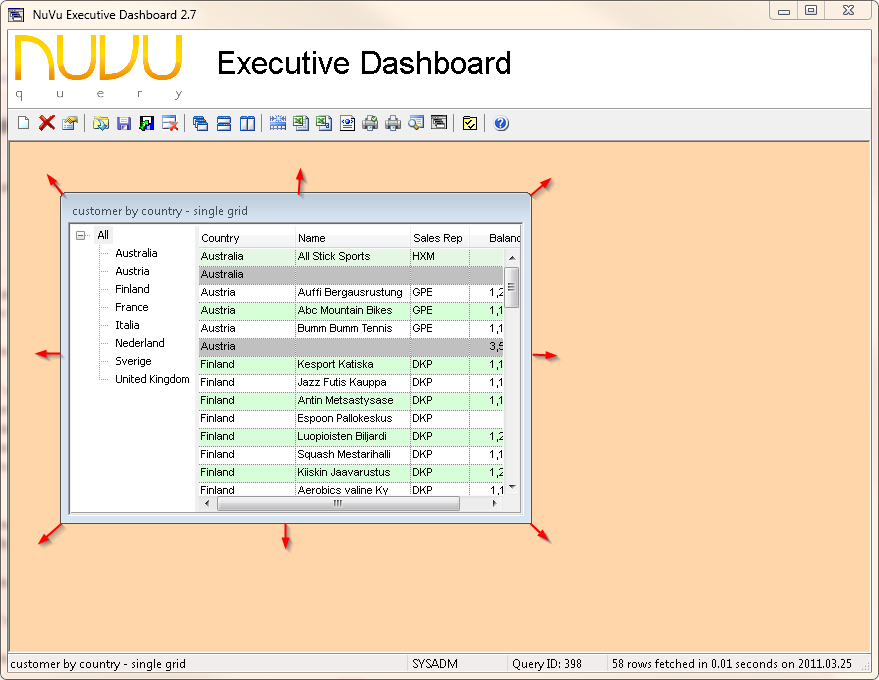
- The object can now be resized by simply moving the mouse to the edges of the object window. The mouse cursor will change to show that ‘resize’ mode is enabled, so to resize the window then left-click on the mouse and drag the mouse to the new position and then release the left-mouse button. If you hover the mouse over any corner of the object window, then you are also able to resize both the horizontal and vertical dimensions of the window at the same time.
- The object can also me moved around the containing Dashboard window by left-clicking and holding the mouse button down on the title of the object window, and then dragging to the required position before releasing the mouse button.
- Click the
 (Save) button to save the current dashboard (including the child query object that you have created in this tutorial).
 - To remove an object from the Dashboard container, simply click on the title of the object in order to select it, then click the
 (Delete) button to remove it from the dashboard. NOTE: The actual removal will only be permanently made when the dashboard is saved by pressing the (Save) button.
End of Tutorial