

Tutorial 14
Creating a schedule for a query
This tutorial assumes you have the knowledge gained from working with the previous tutorials. After this tutorial you will have the ability to schedule any query so that it can be automatically run by the NuVu Query Scheduler at the date/time desired, and deliver the results of the query via email.
Perform the following steps:
- If the Query Designer Tool is already running, please close it down. Invoke the NuVu Query Designer from the NuVu Query program group from the windows Start menu. The main NuVu Query Designer window will be displayed, and a welcome dialog window will also be displayed that shows recently saved/opened queries. We are going to create a new query from the previous query (tutorial13), so double-click on the ‘tutorial13′ item that should be displayed inside the Welcome dialog window (if you have successfully performed the previous tutorial and saved it as specified in that tutorial with a name of‘tutorial13′). The original query will open inside the Designer. We need to now save this as ‘tutorial14′ before we start working with the query, so click on the File->Save As menu item and advise a new Query name of tutorial14 when the save properties are displayed.Click the
 button to save the query with the new advised name (tutorial14).
 - Click the
 (Schedule) button on the toolbar to invoke the scheduler window. The following window will be displayed:
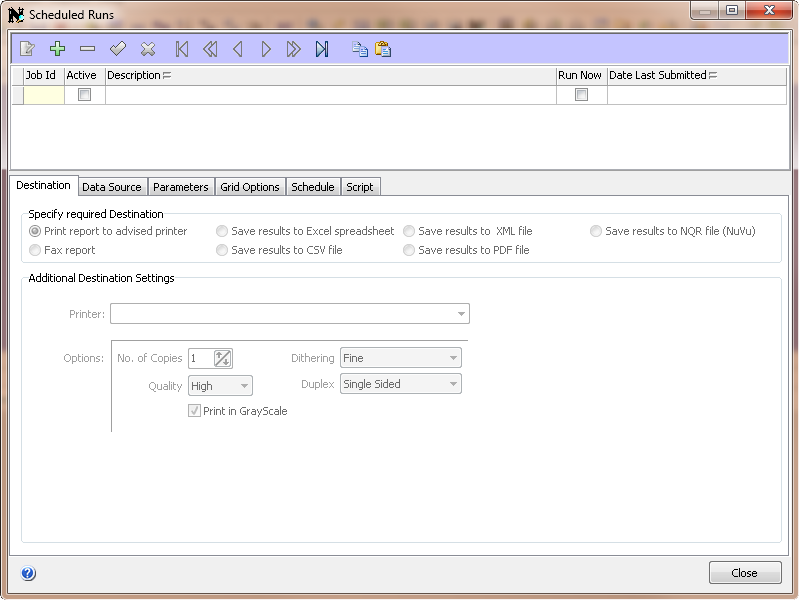
- We now need to add a schedule, so click the
 button on the toolbar to start editing the new schedule. You will be positioned withing the ‘Description’ field on the browser, so type in an appropriate description for this schedule (for example: “This query is run every Friday at 9am”). Now click on the ‘Destination’ tab folder. That will present the options available for choosing which destination you wish the results of this query to be delivered to (for example: Fax, Printer, PDF, XML etc). In this tutorial, we are going to output the results to a PDF report and email it to somebody, so tick the ‘Save Results to PDF file’ option. You will notice that the available options may change. The filename of the PDF document that will be created is automatically set for you (but can obviously be changed to any valid destination folder). We are going to email the generated PDF document, so tick the ‘Email recipients’ tick-box and advise email information as shown below:
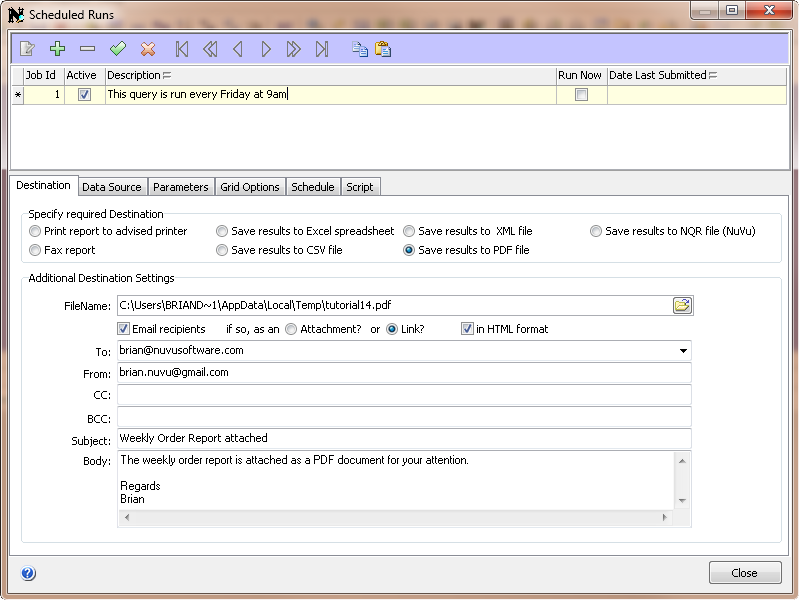
- Next we need to advise when we want this schedule to execute, so click the ‘Schedule’ tab. NuVu provides many flexible ways to schedule the reports at any instance in time (including repeating the execution of the query multiple times after the start date/time) but for our tutorial, all we need to do is specify that we would like this query to execute every Friday at 9am. The first thing to advise is the start date (which you can leave as the default of today). Then advise a start time of 9am. Then tick the ‘weekly’ radio item. The screen will refresh to show you options including on which days to execute the query. We will tick the ‘Friday’ tick-box only. The end result should look similar to this:

- Click the green tick at the top of toolbar in order to save the advised details for this schedule. The schedule is now active and will execute on your next Friday at 9am
- The scheduler window can now be closed by clicking the
 (close) button on the top-right of this window. You will then be returned to the main query window.
 - Finally we will save any other changes made to this query, so simply click the
 button and close down the query tool.
We are complete with the tutorial. An exported query containing this tutorial is available by right-clicking here and choosing Save Link As (Firefox) or Save Target As (Internet Explorer) to save the query import format file to a file on your hard disk, and then importing that query into the query tool (hint: choose File->Import Query from the main menu of the Query Designer).
End of Tutorial